DIY Sugar Skull Cakes
With Halloween creeping around the corner it's the perfect time to start thinking about what kind of spooky desserts you can present at your party. Or maybe you just want to get into that Halloween spirit.
Luckily for you, I'm one of those people who starts thinking about the holidays loooong before they are here. Is my house already decorated for Halloween in September? Maybe... I get excited, okay!
What you'll need:
- Skull pan (I used this one: Wilton 3-D Mini Skull Pan)
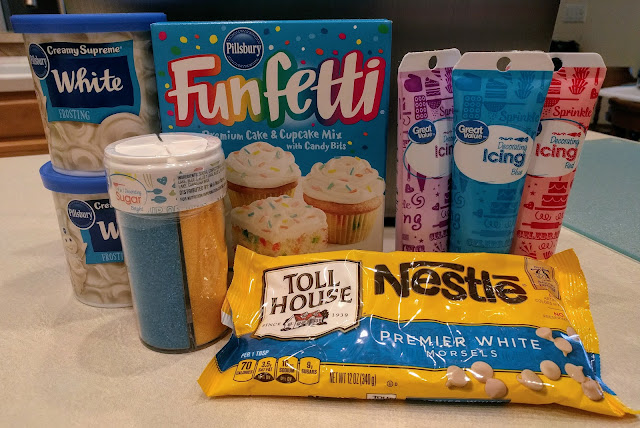
- Cake mix (this can be store-bought or your own recipe)
- Non-stick spray
- Cooling rack
- Frosting
- Different colored decorating icing
- Piping bag with a small round tip
Optional:
- Sprinkles
- Fondant
- Candy markers
- Flower icing tips
- Any other edible decorations/candies
Steps:
1. Preheat your oven according to your cake mix
2. Prepare your cake batter
2. Prepare your cake batter
You can use whatever cake batter you like, but I suggest a lighter colored one if you plan on covering your skull in white frosting as it will cover better.
3. Spray your pan with non-stick spray
You can use any kind you want as long as it prevents the cake from sticking to the pan.
4. Fill your pan
4. Fill your pan
One box of cake mix is the perfect amount to fill the pan. Don't worry if it bakes over a little; you'll cut this off later.
5. Bake for 24 minutes
5. Bake for 24 minutes
This is how long it took for my cake to be done. You might want to check on your cake sooner, depending on your oven.
6. Let cake cool before removing from pan
You need to let them cool fully or they will crack when you try to take them out.
7. Cut off the backs to make an even surface
7. Cut off the backs to make an even surface
This step is crucial in putting together the skulls. The flatter the surface the easier it will be to put them together. A serrated knife works well for this.
8. Optional: Filling
8. Optional: Filling
If you want to put filling in your skulls now would be the point where you scoop out a little bit of cake to make room. I filled mine with a white chocolate ganache that I died pink with a little food coloring. You can fill your skulls with whatever filling you want (mousse, candy etc.), or you can skip this step all together.
9. Use frosting to "glue" pieces together
9. Use frosting to "glue" pieces together
Frost the edges of the back of your skull. This will work as the glue to cement the two pieces together. I found that you don't want to put too much frosting or the pieces push apart.
10. Let the frosting harden in the fridge
10. Let the frosting harden in the fridge
I left mine for about two hours.
11. Once cakes are firm coat with melted frosting
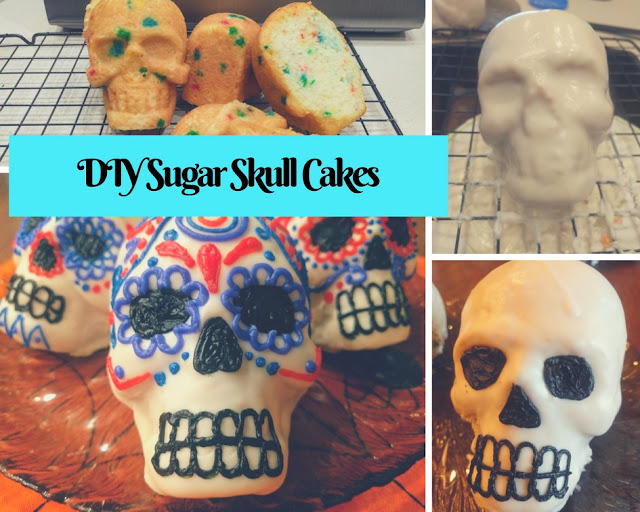
You will want to put your cake on a cooling rack and place something underneath to catch the excess frosting. Melt your frosting in the microwave (it should only take 30-60 seconds) and then pour the melted frosting over your skull.
I know, what a handsome looking fellow.
12. Repeat until desired texture is achieved
The more layers you use the smoother it will look. I did about two-three layers. If your frosting is too thin you can thicken it by letting it cool for a little bit. Honestly, you could stop here because these already look pretty badass.
13. Let the frosting harden in the freezer
13. Let the frosting harden in the freezer
It will take a few hours for it to really solidify, but it is important to have a solid base before decorating. Placing them in the freezer the night before you decorate them is optimal.
14. Decorate
Here comes the fun part where you can let your creativity take over. I frosted the facial features in black first before going in with the colored icing. Use whatever colors you want and play with different designs.
*If you don't have a piping bag you can put the icing in a sandwich bag and cut the corner to make your own like I did (100 points for laziness). However, your lines will be neater if you use an actual piping bag and tip.
Extra Tips:
Extra Tips:
- Create your own icing colors by adding food dye to white frosting
- Use fondant and edible candy markers to draw on more detailed designs
- Flower icing tips can create intricate flower designs
- Add candy to create more dimension and variety to your skulls
You can have a lot of fun decorating these. I just used some different colored decorating icings that I bought at the store and detailed each skull with different patterns, but you can be as creative as you want and experiment with different things.
Decorating these skulls would make a great party activity, or you can just use them as decorative food displays.
Let me see your own creations. Post pictures of your skulls in the comments!
Let me see your own creations. Post pictures of your skulls in the comments!


You make these look so easy. I'm so going to try these for my Halloween party.
ReplyDelete